Your first five minutes: a tour of the screen
Hebrew Explorer opens straight into the Bible. There is no sign-up and nothing to install. Everything you can do starts from a handful of buttons along the top and bottom of the screen. This tour shows you each one, so you always know where to go next.
Open The reader in a new tab →
- The Bible text is the center of everything
- The top bar: book, translation and search
- Tools ▾ opens every study tool
- The three icons in the top corner
- The bottom bar: move through the Bible
- Tap anything gold or underlined
Step 1: The Bible text is the center of everything
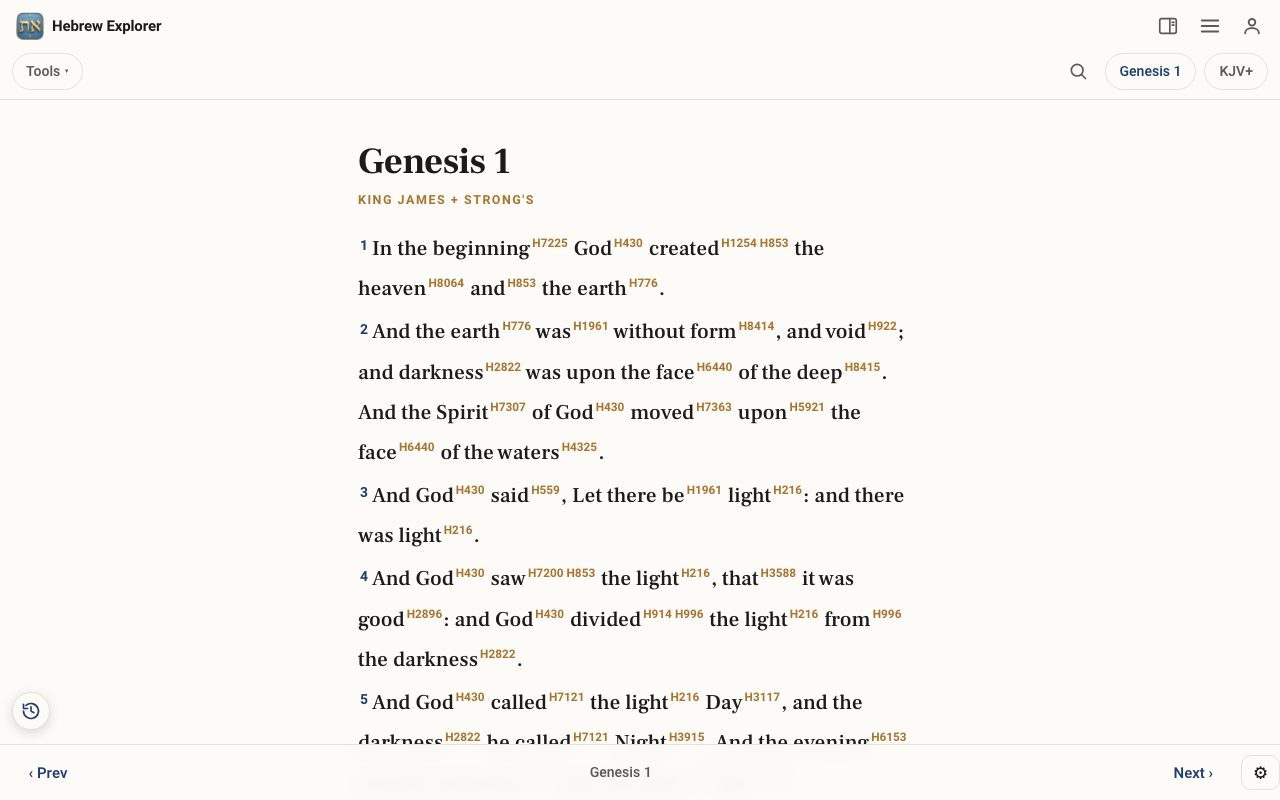
When the site opens you are reading a chapter — Genesis 1 the first time. The small gold codes after words, like H7225, are Strong's numbers. Each one links to the Hebrew or Greek word behind the English. You will use them a lot.
Step 2: The top bar: book, translation and search
Along the top you will find the Tools ▾ button on the left. On the right are the magnifying glass (search), the book and chapter button (it says Genesis 1), and the translation button (it says KJV+). Tap the book button to jump anywhere in the Bible. Tap the translation button to change versions.
Step 3: Tools ▾ opens every study tool
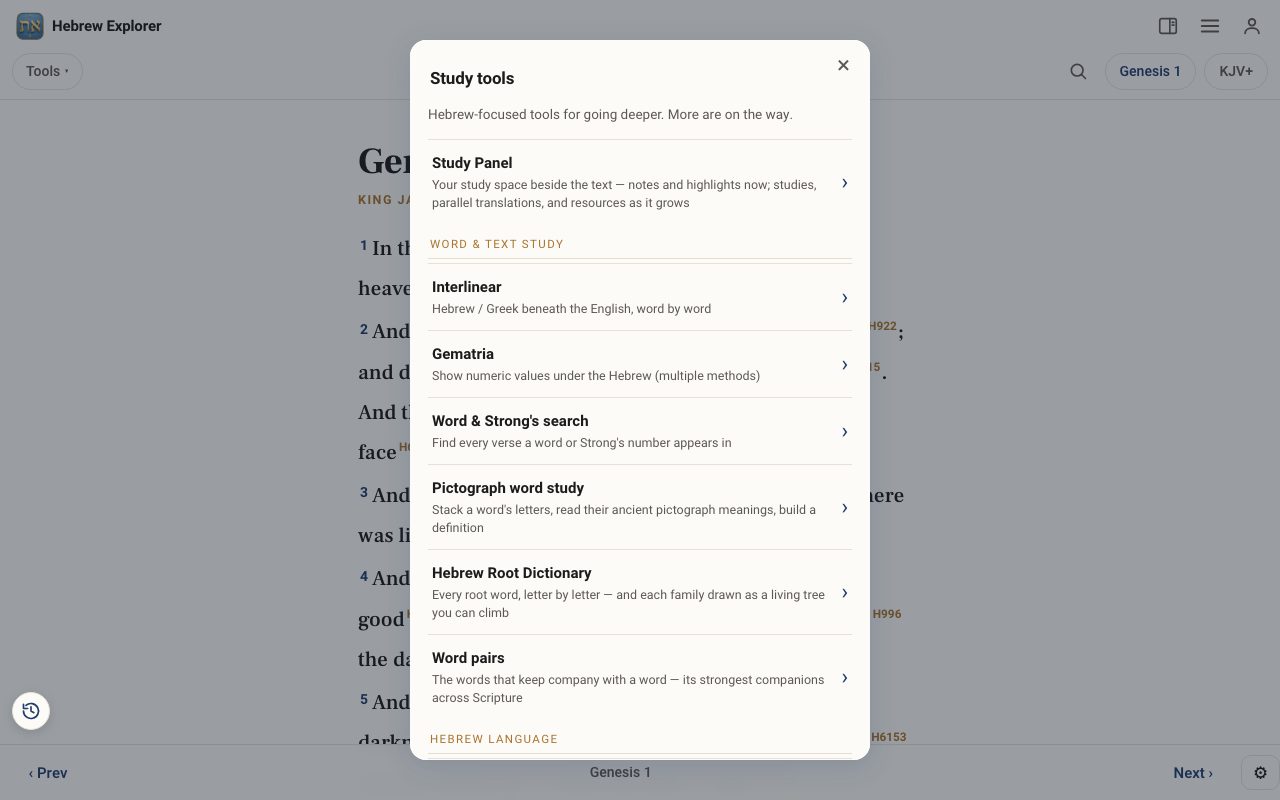
Tap Tools ▾ to see the full list of study tools, grouped by kind: Word & Text Study, Hebrew Language, Names, People & Places, Deeper Study, Text Treasures, Daily & Portions, and More Tools. Tools marked PRO are part of Hebrew Explorer Pro. Everything else is free.
Step 4: The three icons in the top corner
At the very top right are three icons. The panel icon opens the Study Panel, your study space beside the text. The three lines open the site menu (Reader, Apocrypha, Blog, Tutorials and more). The person opens your account, where you sign in or create a free account.
Step 5: The bottom bar: move through the Bible
At the bottom, ‹ Prev and Next › step to the previous or next chapter. The gear ⚙ opens Reading settings (font, text size, colour theme). The small clock button at the bottom left shows your history for this visit, so you can jump back to anything you opened.
Step 6: Tap anything gold or underlined
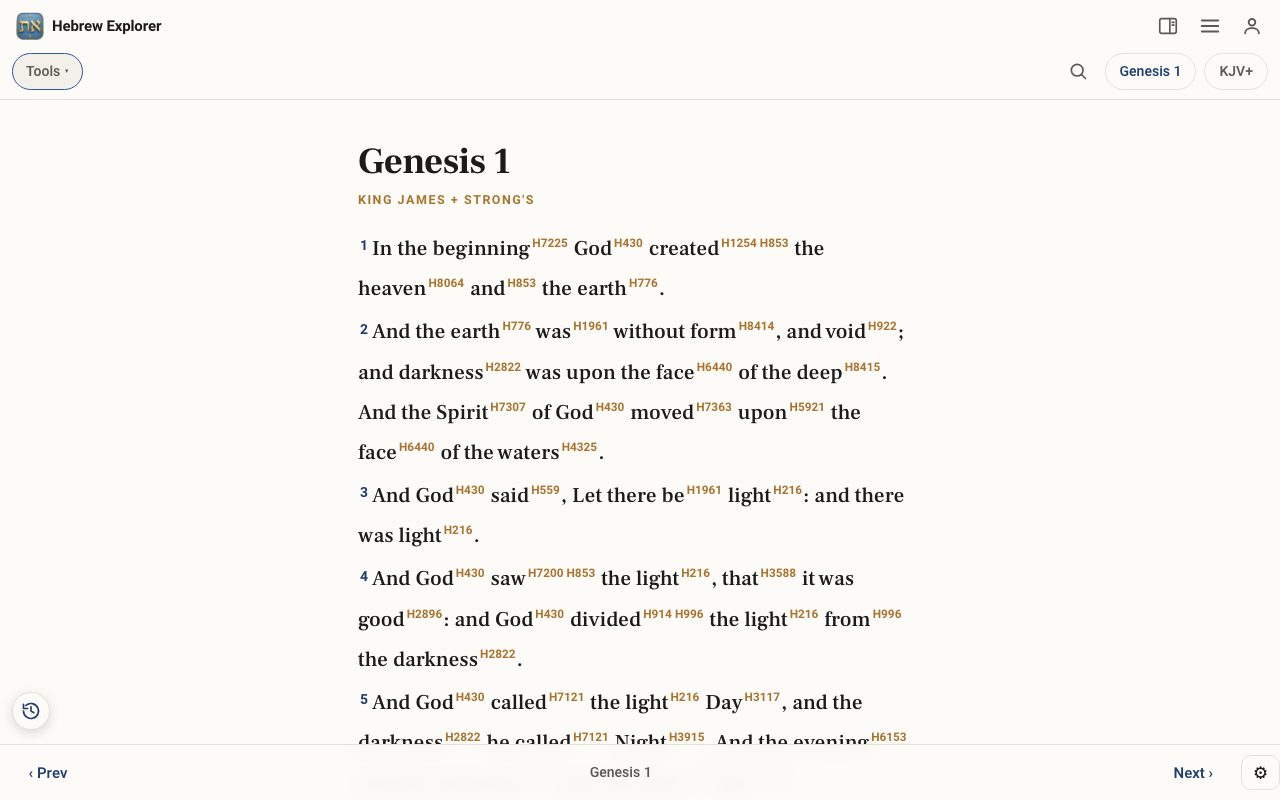
Most things on the page can be tapped. Tap a Strong's number to open the lexicon. Tap a verse number to highlight the verse or write a note. Tools that make words glow (names, places, numbers, verbs) let you tap the glowing words for more. When you are not sure, tap it and see.
Related tutorials
- Reading the Bible: find any book and chapterJump to any book and chapter, move chapter by chapter, and go straight to a verse.Free 3 min · Beginner
- Choosing a translation — English, Hebrew, Greek and moreSwitch between English versions, the Hebrew and Greek originals, the Septuagint and Spanish.Free 4 min · Beginner
- Tap a word: reading the lexiconOpen any Hebrew or Greek word to see its meaning, pronunciation, gematria, every place it appears, and the classic lexicons.Free 6 min · Beginner
- The Study Panel: your study space beside the textResources for the chapter, your notes and highlights, saved studies, a parallel translation, books and search, all beside the text.Free 6 min · Beginner